Showing posts with label woodcut. Show all posts

Wednesday, November 26, 2014

A Little of Everything

If a person were to judge the activity here from the number of posts it would appear that most of the time there is absolute quiet.  However, even though we don't make much noise, several things have been on-going.  Firstly, there is the LaPierre Lane sign.  About 2, maybe 3, years ago hubby brought this poor bedraggled worn and soggy wooden sign in and asked if I could re-hab it.  Oh sure, I answered with fake confidence, and quickly stuck the thing under the press and forgot about it.  Maybe 6 months later I got it out and sanded it a bit.  At that point I began to realize just how much work was going to be involved and quickly stuck it back in its temporary home, under the press.  Now the several years passed and it accidentally surfaced again.  I decided it would make the perfect birthday gift for the guy who has everything, including me.  So, I set to work - and honestly, I wish I had a before picture because the transformation has been shocking, to say the least.  It involved a lot more sanding, which was infinitely easier to do once it had r-e-a-l-l-y dried.  And, then the fun began: first with the oil-based exterior primer where ever paint was going.  Then the staining for the background, followed by 3 coats of exterior latex paint (dark brown edge and back) and raw sienna (they call it cedar) for the lettering and last, but not least, 3 coats of Spar Varnish over the part that was stained.  The last of the varnish went on today, so it should be good and dry by next Wed., which is the Lucky Guy's 80th birthday. Unfortunately, he will not be surprised because he walked right by this thing half a dozen times and didn't notice it and then on the 7th time he saw it.  I should have known that my luck was not going to hold out indefinitely.

The origin of the sign is unknown.  It was something that the younger brother, Len, had at his house in Salmon Creek, Idaho.  When Len died his widow gave it to Mr. Lucky and he brought it home.  So, we don't know whose handiwork it is, nor do we know its age.  All we know is that now it is looking good and will hopefully last way past us.


Meanwhile, the other day I got the ladder out, moved a bunch of furniture and other stuff around, and hung the Puzzle Print "City of The World".  It consists of five 22" x 30" sheets, or a total of 30" x 110".  I don't know if there's any significance that the road in the middle heads off down to the bathroom door, but I choose to think that there just might be...


And, here is where the nonsense ends and the, more or less, serious work begins.  Below are two (you probably will have to take my word for this, two pieces of acetate with black ink.  The one on the left will be the background and the one on the right will be a Superb Starling (the ornithologist name for him, not mine - if I had my way he would not be in the Starling family -).  These will be exposed onto the solar plates  as soon as I get back to the studio.  And, then we will see if we can get a decent print to develop.  Or, it may end up a woodblock - but since this has a deadline and the holidays are nipping at my heels, I'm hoping to knock out a quick little intaglio. 


Saturday, November 22, 2014

The Fantastic Fantastic Garden

Somehow time has flown by and I am just getting around to hanging the Fantastic Garden print.  I'm sure that I will enjoy it much more now that it is out of the drawers and up on the wall.  Hanging was not an easy project and definitely not for the faint of heart, or those of us who have our qualms about teetering on step stools on top of cabinets leaning precariously over exposure units thinking all the while that we are about to fall and break our neck.  But, the job is done and I am breathing again.  (Isn't it strange that when we put our bodies in peril, no matter how slight, we tend to hold our breath until back to normal footing?  You'd think we would be busy getting as much air in as possible, not keeping it out.  Oh, well.... that's what most of us do, anyway.)


I suppose to really appreciate the peril involved in this  activity you first must realize that the ceiling is at least 10 ft.  (I'm sure it is 15 ft. if it is an inch, but I'm told it is 10 ft. and he has made me a believer after all these years that he is always right.)  But, I was the one hanging in mid-air hanging the garden.   NEWS FLASH!!  This just in:  the ceiling is 12ft.  This is the first time in the history of Francis that he has been mistaken.  Not wrong, mind you, but a little mistaken.  There's a difference.

The Fantastic Garden is a puzzle print - the result of the organizational, drafting, cutting, sawing,  creative, herding, and printing skills of Maria Arango-Diener.  I've forgotten how many artists are involved, but they come from all over the globe and each contributes their idea of the project theme, in this case the Fantastic Garden, and then Maria re-assembles all the parts, prints them and sends us each a print.  This print is 4 sheets, each 22" x 30", so that would make the total surface 44" x 60" if my calculator doesn't lie.  Altogether it is a pretty fantastic woodblock print carved from cherry plywood and printed on Stonehenge Rising.

Thanks to all you wonderful Baren Forum woodblock members (and especially to Maria the Wonder Woman of the World of Woodblock) for enriching my life and making my studio Extraordinaire.  It will be even more extraordinaire when I get the City of the World up on the wall.  But, that will have to wait until next week - it will take me that long to drag the ladder back in again.

Monday, April 28, 2014

Photo Finish

The ponies are headed for the finish line and with any luck at all, they will reach it today!  The latest incarnation involves playing in mica.  Well, why not?  The deadline is flexible so I can take as long as it takes, which is really quite a grand feeling!

There is some pesky trimming to be done, too - unfortunately, the fingers were not always pristinely clean when handling the paper.  Rats.  Here is a photo of the pony with his/her iridescent  circles - I hope they will show up on various monitors….


Now the only thing remaining is the clothing.  You didn't think I would send these babies out in the buff, did you?  Having already gone silly over this project, here is the finishing touch -


After the trimming and dressing are complete there will be the little matter of finding envelopes which fit.  Oh oh.  Probably should have thought about that quite some time ago.  And then there is also the story about this little pony to be written.  He/she has had quite an illustrious past and I'm sure everyone will want to know all the delicious details….. maybe not!  At any rate, I do hope everyone will enjoy this little fella as much as I've enjoyed putting it together and that it will bring you veritable downpours of good luck in many different forms.

Wednesday, April 23, 2014

Trouble at the OK Corral

This gift horse is quickly becoming the gift that keeps on giving.  Finally, I finished mucking about in the background and moved onto the blue and yay! it was time for red.  Such excitement in the corral, and then to my horrified eyes should appear - the part of the red block that I had mistakenly carved away.

The stripe on the saddle nearest the animal's head has no red.  I'm sure to the less obsessive compulsive of us this would not have mattered, but to the rest of us - well, this had to be remedied.  So, on comes the fake wood -  or to be more genteel, QuikWood, as it is known at McClain's.   Or, you can find a similar product at your local home improvement store.  I simply mixed a little ball of this wood putty stuff, flattened it to the right height, smushed it on the block where I'd made my mistake,  and when it was dry, carved the missing part back in.


Now all the stripes have their red part.  The purple line block has been printed again and everyone is in blotters drying.  Or eating, or sleeping, or whatever critters do when they are between blotters and weighted with a piece of plywood.  They will rest there until morning and then it will be on to the next step. I'm not hearing any noise from them - they must be resting peacefully.   I think we can surmise that the trouble at the corral is over.  For the moment.

Meanwhile, I need to run down to the local version of a yarn store and see if I can get the right size needles for the next knitting project.  It is a constant problem to keep me entertained and off the streets.

Friday, April 18, 2014

The Gift Horse

It must be the Year of the Horse - I assume that is why ponies of every description have been galloping in here since last December.  After a  few years forced hiatus (forced by lack of time, and/or energy) from the Barenforum New Years Card Exchange, I decided to again participate.  But, January, February, March and now most of April have come and gone and I have yet to produce a pony.

We've seen Trojan horses, galloping horses, dancing horses, prancing horses, rocking horses, stick horses, horses of many colors, chess piece horses (that was the one I had in mind and then Andrew did it first and better which really ticked me off! Especially the "better" part), and you name it, that kind of horse has been through here.  Henceforth, and to wit and all that, it was really hard to come up with something everyone hasn't already seen.  And then I had a flash of brilliance.  Truthfully, that may be a bit overstated, but suddenly I remembered this little horse on wheels that my granddaughters had when they were toddlers.  They rode that horse all over the house until their legs got too long for it.  Their mother tells me it is a "hand me down horse" from Kmart.  So, I decided to call it the Gift Horse.

Pre-launch of the gift horse I was going to post moment by moment progress, however I was several moments into it before I remembered that that was the plan.  It started with a plain yellow background, followed by a stencil of green circles, another stencil of kind of orangy circles, then those seemed too bright, so another drop of lemon yellow and then I remembered that this was going to be step by step.
But, before I managed to scan it I plunged into the blue body which required two drops to get a bright blue.

Up until this point it really looked pretty much like a beagle with round legs anyway, so you didn't miss much. And then I realized that I really should have printed the purple so I could tell if things were lining up properly.  Guess it has been awhile since I printed this way.  Today the purple is going down and we can see that  registration is going pretty well:


So, this is where we are today - about half way through the purple.  When we move to the next color I'll let you know.  But, a funny thing happened on the way to this print.  I started cutting paper and apparently didn't know when to stop because I have about 68 of these things and it takes a while for me to get through the pile.  Sometimes it is two days to get one color down.  Therefore, don't hold your breath for the next sign of progress.  Easter is coming and there are eggs to prepare and other forms of foolishness and fun.  Happy Easter, Passover, Solstice (a few days late, but hey! any excuse to party) or whatever you may be celebrating this weekend!  We will be having our annual Geriatric Egg Hunt at son and daughter-in-law's house this year.  The age range of hunters is 4 - 80+.  We are heavily slanted on the over 60 end of this thing.  The bunny hides about 150 eggs and it is every man or woman for themselves when the starting whistle is blown!

Monday, November 11, 2013

OMG - More Flags

Will this flag saga never end?  I think I left off with having the background printed (before I left to traverse the world).  That proved to be more problematic than I had anticipated.  I thought the flat of gold textile ink, which was screened onto the fabric, was in the middle of the fabric and that it would be a simple matter to print the border and the flower where I wanted them.  None of this proved to be true.  First - the flat somehow was not in the exact same place on each flag although I am at a loss to explain that since I put them all down in precisely the same place on the bed and pulled them exactly the same.  Oh well - another of those printmaking mysteries.  This made it nigh impossible to get the border and image in the middle of the flat, but I donned my suit of armor, jumped on my white charger, and spear (or brayer) in hand, forged ahead pretending that I knew exactly what I was doing.  Most of them turned out to be, more or less, in the middle.  At any rate, I am pleased with the result and am now ready to move on to the next project, although at the moment I am not entirely certain what that will be.....

Here are the flags hanging above the studio door, ready for Open Studios Tour last weekend:
 And, below is a closeup of three of them:
I'm certain they are going to waft their thoughts of wisdom, beauty, love, friendship and imagination all about the house and garden and we will live in perfect tranquility forever after.  Well, it's a beautiful thought, don't you think?

Of course, these beauties are for sale - you can have a set of your own for a pittance!  If you're interested the set is $100 or $25 each for an individual flag.  Each flag is 12.5" x 16", hemmed and strung on polyester cord. Contact me at Barebonesart@ comcast.net


Thursday, June 13, 2013

Fairy Queen

I'm assuming that you are also participating, or at least know of, the next monumental puzzle print - the babe of Miss Maria of the Monumental Mysteries.  You will recall that the last such endeavor was the City of the World, in which my contribution was a playground for children.  I used a photo of my oldest granddaughter, Grace, on the monkey bars in a park in Madison, WI,  for my inspiration.  I think she was about 4 yrs. old then - now she is an old woman of 15.


The theme for this year's Monumental Puzzle Print is a Fantasy Garden.  The puzzle piece I received reminded me immediately of a butterfly.  But, I thought there would be plenty of butterflies and I should do something that would reflect my younger granddaughter, Camille.  When Camille was around 4 yrs. old she was your ultimate faery queen.  Upon arising in the morning one of her first demands was, "Where is my crown?"  As soon as she located it she whipped on her wings, donned the crown and was good for the day unless they had to go out and then the wings would have to come off in order to get the jacket and and car seat accommodated.  It didn't take long for me to decide that every garden needs fairies - especially ones who carry on long conversations with lady bugs while the fire flies light the night.  (Camille loves bugs!  She thinks the baby leeches are just the cutest things, as they crawl up her arm...)


It will be great fun to see all of the other contributions to the Fantasy Garden and I'm looking forward to the next day and night Printing Party!  Meanwhile, I've decided to take violin lessons and see if I can play it after a hiatus of roughly 60 years.  My poor, long suffering, instructor will be here momentarily. 

BTW, I forgot to mention that Ms. Maria forbids us to proof our blocks.  They do unpredictable things having to do with humidity and lack there of when they have been inked and cleaned and then go to Las Vegas where she resides.  In order to proof both of these blocks I wrapped them in foil, put them through the press, inked and printed them very carefully.  Once they go to Maria they are pretty much gone forever - until she arrives with all of the pieces glued onto their matrix and ready to print the  w-h-o-l-e thing. I believe she said there will be 6 sheets of paper to complete the image - maybe it was more. I know there are a lot of us involved in this project. Printmakers have the most fun!!

Monday, March 11, 2013

Mum Proof

Today was proofing day on the mum segment of the flag project - here's a sample of the days product:

 I'm happy - there's minimal clean up -

But, then I messed about with the border, thinking I wanted something gold-ish.  The first is black with gold:


And the next is just the gold alone:


I thought I would want the gold alone, but now I'm not sure.  The black with the gold looks pretty rich.  Tomorrow, time allowing, I'll put them together and see which is better.


Wednesday, March 6, 2013

Mum's The Word

It was an all around successful day in the studio.  The Blossom Race was a runaway win with the old fashioned, albeit perennial favorite, Chrysanthemum as the undisputed winner.  Truthfully, there was never any doubt about who the winner would be - friendship had to be in the mix.  The drawing went well and I may have uncovered the secret to getting that transfer paper to do a better job of its intended purpose.  First, the image needs to be 300 dpi.  Second, the paper setting should be on plain white paper.  Third, the ink should be set to black or grayscale.  Fourth, use a baren to burnish the image to the block.  So, there you go - all secrets have been bared for all to see.


The only addition I could ask for would be some Artificial Intelligence that would automatically know not to transfer the lines I decided not to use....   Maybe in a parallel universe.

Meanwhile, tomorrow morning the carving will begin.  Can't wait to get started.  Being a printmaker  is so much like being a kid playing with favorite toys.  Think of the studio as a playpen although  I don't know that parents use those anymore.  I guess kids go to daycare instead.  Well, think of the studio as my daycare without a supervising know-it-all adult.  (Although, at times I could use one....)


The Rose Marches On

A memory must be a wonderful thing to have.  I wish I could remember when I had mine.  There should be a course, somewhere in the academic career of each individual, which would require that all students be mandated to cherish their memories because they will be bound to screw up at some time in their life.  Apparently, that day has arrived, once again, in mine.  Maybe it was wishful thinking, but I could have sworn that the rose was the final prayer flag image.  Alas, it is only the penultimate.  Nevertheless, this is what has happened since the previous post.  At least, this is my memory of it.

The block is carved and ready to proof:


And the proof:


There are a few little spots to clean up, but not too bad for a person with no memory.

So now, as they say, it is back to the drawing board for the final image.  Which one will it be? I had several tied for last place when I thought the rose had won.  It would appear that I need to revert to a previous post to see what the heck those were.  Stay tuned.  Providing I remember to post again the secret will be revealed.

BTW - have I mentioned that I've been doing the Luminosity.com brain exercises?  It may not be believable, but I have been very good at doing these 5 days a week.  They are guaranteed to improve ones memory. Hmmmmm. Maybe I should see about a refund.  If I can remember.....

Wednesday, February 27, 2013

A Rose Is a Rose Is a Rose... On a Flag

Back in the studio after a couple of days of other projects and a day of pure fun with an old friend.  In fact we are so old we go all the way back to 4th or 5th grade (neither of us can remember).  When we get together we giggle like a couple of 4th graders, so maybe that was it and we have failed to progress.  But, I'm rambling which reminds me of roses and that is where we are.  It was a tough fight between sunflower, chrysanthemum, bird of paradise, zinnia, acanthus and, my fave, bells of Ireland.  Rose won not for being faster, but because I remember the roses in front of Pat's house and how she loves them.  And, what do you know, in Flower Language the red rose means love.  Every garden should have lots and lots of love wafting about on the breeze - in fact, I think it may be a law, or a code, or something.

The drawing is ready:


Next is to print it out onto the studio paper and then transfer to the block, sharpen knives, and carve, baby, carve!

Sunday, February 24, 2013

Proof of the Pudding

The pudding being the flags, of course.  Chips have been flying around here and there is another batch to be swept up and sent to that great mulch eater that we call "the garden" (which is really the battle ground where we fight for survival against deer, moles, voles and slugs).  But, before that happens (and because there will be a few more when I find out where I need to carve a little deeper or a little more - there's no sense in making extra work my mother used to say -).  Therefore, I show you the block in its more or less pristine condition (sans any ink).  My blocks look more as if I had chewed on them than carved them - not neat and tidy and smooth like David Bull's.


 But they work, and  from this here is the first proof done using Akua Intaglio inks.  I'll be printing these with textile or oil base inks and the orchid itself will probably be printed with some shade of purple ink on the yellow flag:


Not too bad - there is a minimum of cleaning up to do on the block.

Here is a sample of the blossom with the border -  (the same border will be used with each flower)


There will be some registration adjustments, just a slight movement and I'll use my trusty all purpose registration board with these:


With the image printed onto the acetates I can line them up on the registration board and voila! Everything will come out easy as pie. We hope.

There will be some improvisation with these flag prints as they are to be printed on fabric.  The proofs I took today were burnished by hand and the fabric is going to have to go through the press - when all the blocks are ready I'll start fabric trials.  They are all laundered and just waiting for some images - I can hear them in the back of my head, " Is she ever going to get to us or are we just folded fabric sitting here to decorate her studio?"  The answer to all of the above is yes.  OK.  I'm on it.  Just not today because there are other things to do.  Not tomorrow, either, because I'm going across the bridge to the Big City (Portland, OR) and play with the other kids.  Maybe I can get the next drawing done by Tuesday.  We'll see....  There is not a real deadline on these which is very, very nice - but, I have to keep a close watch on self or she will get preoccupied with something else and it could be years before she gets back to these.  I think the alter-ego-task-master-person is going to have to be in charge.


Thursday, February 21, 2013

Let The Carving Begin, Almost

Probably no one is interested in this, but I thought I would give it a go and see if I could do it.  "It" is documentation of a print from start to finish.  Not knowing quite where the beginning is I decided (quite arbitrarily) to start right after the block has been cut and sanded as smooth as a babies behind.

This method of transferring the image to the block is using the Studio Paper from McClain's.  I have found from experience with the Print From Hell (see previous post) that the ink tends to spread on the wood I'm using and lines are thicker than what I've drawn, which is one of the many reasons I had so much trouble with registration on the PFH, but it works great for one color prints and especially for Western style printmaking.

So, here we go with the image having been scanned and printed via ink jet printer onto the Studio Paper and placed face down on the block:


The ink will stay wet long enough for you to dink about taking photos, etc., so no need to be in a hurry.  However, don't go out for a beer - there isn't enough time for that right now.

Here's the tricky part:

Rub the back with your hand - does not need pressure to transfer.  At least not a lot of pressure.  You can use a baren or the back of a wooden spoon or a smooth river rock or - anything.  McClain's recommends using a slip sheet (maybe if I did that I would get a cleaner transfer?  I'll have to try that next time...)


And:  here is the result using the hand only:


That's not too bad, and certainly clear enough for my purposes on this print.  

And, here we are: all ready to start carving - tomorrow.  Times up for today.  Actually, tomorrow is a social (aka chocolate dessert with friend) day, therefore carving will not start until Friday - but watch the chips fly then!


Aha!  You thought I couldn't hear you, didn't you?  You were saying, "I don't see any kento marks.  She is going to have the same problems she had before - she has forgotten all about registration.  Hoo, boy, she is headed for Print From Hell #2".  Au contraire, mes amis! I do have a plan.  It may be ill begotten, but it is a plan.  We will see when the time comes.  Uh oh.  ;-)

(Isn't printmaking just more fun than a barrel of adolescent primates? One just never knows what's in store for one, does one??  Unless, of course, you are one of those stodgier types who have learned from experience not to experiment and do what you know works.  I have yet to learn that lesson.  Maybe I'm not as smart as an adolescent primate...)


Friday, February 15, 2013

The Print From Hell Begins...

All of the deadlines have been met except one:  Barenforum exchange # 55, which I foolishly signed up for on Oct. 1, 2012 when Feb. 1, 2013 sounded years away.  I thought I needed something to occupy my time, and then I turned around and flew to North Dakota for a week, and then it was Thanksgiving, and then flew to ND again for Christmas, and then it was Dec. 31, 2012 and I discovered that the Sketchbook Project was due in two weeks.  Their  "next Jan." was tomorrow and my "next Jan." had been 2014.  Well, got to work quickly and did that and the portrait and now it is back to woodblock.

It all started with a simple drawing which I had planned to do Moku Hanga.  This is the drawing:


The theme is motion in nature - immediately I had thought of my daughter, when she was a toddler, and rode on a little seat on the back of my bike.  I updated it with a helmet, but in those days the only thing I really remember was a little plastic strap that went around her middle.  All during our rides she was absolutely dead quiet and I thought she must be scared to death and certain I was out to kill us both. In contrast, her older brother when he rode back there chatted continually about everything in sight.  I never had long straight blond hair, either - call it artistic license.


OK - so got the block carved and proofed and ready to print and realized that I had no way to register this beauty.  Out came the cheater registration system. Voila!  I lined everything up, got my margins all set and pulled some proofs for registration purposes and went to bed.

The next morning the blocks were all waiting for me and I went to work.


I had blocks for blue, red, brown,  and grey and yellow on one block, and a blended blue to green background block.  Oh oh!  Right away I can't get the background to line up properly.  Finally, after hours of trial and error I gave up and carved a new background and printed it - so far Moku Hanga is working great!

But, NONE OF THE BLOCKS WILL LINE UP AND REGISTRATION IS DRIVING ME NUTZ.
It was obvious that I should throw in the towel and start over, but I was already late, so what to do? What to do?  Fuss and fury, what to do!  I did what any half crazed, previously level headed printmaker would do, I opted for hand coloring and got to work on that, which went rather quickly compared to recutting half a dozen blocks.  The only problem was that it looked really goofy with a mix of even sides and sides that went off to nowhere.  So, cut another block!  A frame block to cover all the sins.  I mixed up some blu/black Akua Intaglio ink, rolled it onto the block and to the press with paper and rubber blanket.  Moku Hanga has been totally abandoned at this point.  My patience is caput.

Toddler Flight

It worked moderately well, but this was about as far as I could go with what I had.  Barely visible in this shot is a swirl of interference pigment, added via stencil,  which shimmers when the light hits it properly.  At this point I did throw all the towels in - (the washer) and rushed this lot to the USPS.  And, I want to tell you that I really don't know what they're worried about money-wise.  The fee was outrageous and should keep the USPS solvent for several years.  And, now I need to go write another check to Monica because what I included was pathetic.

One more thing - I want to apologize to all the #55 folk who have been eagerly awaiting this portfolio. This is the first time I've ever been late.  I promise that reformation is on my resolution list.


Thursday, September 27, 2012

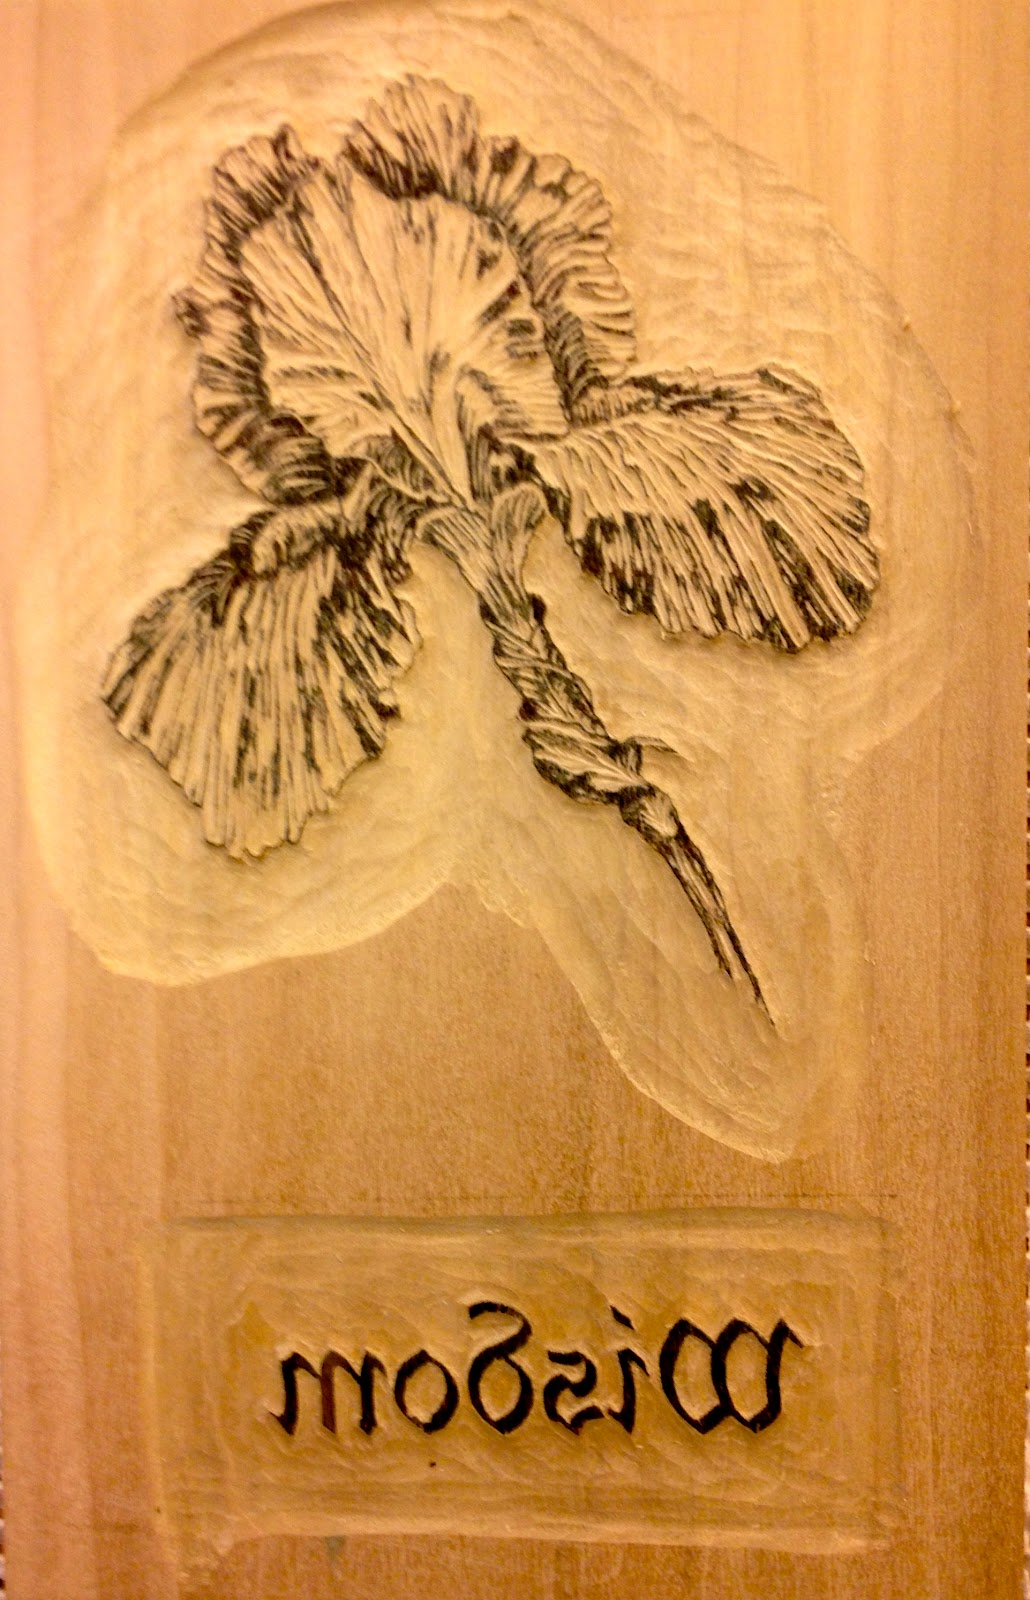
Iris in the Making

A couple of weeks ago the image was transferred to the block via the magic studio paper sold at McClain's Printmaking Supplies.  I love this stuff - it is truly magic.  You just scan your image and print it (ink jet) onto this paper and while the ink is wet lay it upon the block and burnish lightly with a baren. Poof! Your image is on the block and ready to go. Magnifique!


So, then comes the carving.  It is mesmerizing when it is complex and there are many little fine lines. There is nothing quick about it, but as my friend Dave once said, "If you love doing something isn't it a good thing if it takes a long time?"  Or words to that effect, and I have to agree whole heartedly.  I've spent the greatest part of the week, whenever I wasn't doing laundry or cleaning up a mess, in the studio carving away and tomorrow we proof.  I can almost smell the ink.  Proofing days can be both exciting and depressing.  If there is only a small amount of correction that is good, but more can be a problem.  Mostly because now the block has been inked and either you clean it vigorously, or you muck about in sticky ink.  That is when you know the Japanese have it right and you should be using water color, rice paste and sumi ink.  But, this is going to be printed on fabric, so I think it will have to be printed in the Western tradition.  Ahhh, well - wish me luck and check back tomorrow.

Tuesday, September 11, 2012

Poppy Registration Solved

A HUGE thanks to Terri Peart for the suggestion to use freezer wrap to solve my fabric registration issues.  The puzzlement was that I needed to register three times for this image (chalk that up, at least partially, to very poor planning).  Accomplishing this feat with sturdy paper you could do with your eyes closed, but a floppy piece of fabric? Not so easy.  However, Terri wrote to say that quilters often use freezer wrap - it has a plasticized back which allows it to adhere to the fabric with the help of an iron and when you don't need it anymore you simply peel it off and it leaves no residue. Well, call me Ishmael, if it isn't true!  It works like a dream.

Coming up with fabric scraps 11 inches wide was not easy.  I was able to find a piece just large enough - it is left over from making a dust ruffle for my granddaughter's bed.  The flags will not be pink and green stripe, but this fabric is the approximate weight and texture of what I will be using, so it was perfect for the test.


So, aside from needing to do a much better job of inking, I think the Poppy Problems are under control. The thing I really appreciate is being able to use the freezer paper over and over.  Once the required size has been cut it is a simple matter of adhering it to the back of the fabric and then treating the paper and fabric as one piece.

It's too bad the flags won't be pink and green stripe - I rather like it, but I suppose it would be good to hold to tradition somewhat, so they will be solid colors.  This might look good on a sweatshirt or a T, though.... hmmmm, more registration issues, maybe not...

Saturday, September 8, 2012

Helen Frankenthaler

Last week Helen Frankenthaler's work was mentioned on the Baren Forum and it reminded me of the print I did about Ms. Frankenthaler.  It was for a Baren Exchange about someone who had been influential to your printmaking.  At the time I was heavily into her imagery and the methods she used to make her prints.  There had also been a fantastic show of her work at the Portland Art Museum.  They had the paintings she did with the print made from that image next to it.  Fantastic!

The print that I did had her work East and Beyond: 1973 which was a puzzle print, behind her.  In my work I attempted to duplicate that work by doing a small puzzle print just like hers, with the woodblock of her in the foreground.


That total image was then trimmed and adhered to a digital reproduction of her work on a ph neutral paper for that purpose.  Finally, her name was printed and the stamp with her image (also an inkjet print) attached.  That was probably the most fun I have had doing something that I had no idea what I was doing at the time, but it all turned out successfully.  The moral of the story is: Go for it! Experiment!  Have fun!  You will learn a lot and have a whale of a good time doing it!

Friday, August 31, 2012

Clearing the Block


Carving the actual pattern is always fun and you can get to that zone where time doesn't exist anymore and you are one with the wood.  Awakening from this trance and having to face the boring and repetitious part of clearing away whatever you don't want to print can be absolutely brutal.  I wonder if it could be fatal to an older, arthritic person?  (Maybe we don't want to know the answer to that question.) On this block there is quite a bit of clearing away of unwanted wood and it is a rather hard wood (cherry) so it could be a daunting task, however - not in this case because it is Foredom to the rescue.  Foredom is a power tool much like a Dremel on steroids.  It has a flexible cable and interchangeable bits.  One cable is for etching, engraving, etc. and is what I used on the copper piece (see previous posts) and the other cable is for more like a chisel.  The clearing requires the latter.  You can see the tool head next to the block -


This was cleared in about 1/4 of the time it would have taken me to do it with the regular chisel (sitting next to the power head in this photo) and my hand would have ached for hours.  Not to mention how it would have felt during the process.  Using the Foredom I can hold it so that I am pushing from the shoulder in one continuous motion using both hands on the tool.  The blade only cuts back and forth when pressure is applied.  It is a really cool little toy!

There are no registration marks on this block, yet, because I really have no idea, or rather I have several ideas, of how to do this and will figure that out when I get to it...

Next - there is some computer work to get the drawing for the center image where I want it and then transferred to another block.


Tuesday, July 12, 2011

The Peril of Too Many Pelicans

Sometimes a block just cries to be printed in many different ways, and such is the case of my pelicans.  They have been on "fabric" and they have been made into a "dress", but they were not content.  There was a piece of marbled paper in my flat files and they screamed to be printed on it.  Between the Pelicans and the paper wailing "oil spill, oil spill" I had no choice.  This cacophony must be stilled.  The result:


 And, I was happy with this until..... one day as the print was lying on my framing table another print of the same image, but on the filmy Japanese paper that I used to make the dress, fell on top of this one.  Oh my!  This led an entirely new dimension.  So, I lined them up and then very carefully adhered  the two together.  There is no going back now.  Here is the final product:


This set my oil slick more in the background and gave the whole scene another dimension - almost making it look 3D without the glasses.  Whoa, Nellie!  I could be on to something!

Wednesday, April 20, 2011

Caer & Angus

After several weeks of carving (I'm neither speedy nor tenacious) and a solid week of printing, the work for the Mythology exchange is done and ready to go into the mail and wing its way to IL.  Carving the line print on a piece of cherry plywood from McClain's was pure joy.  I think I only had one spot where a piece splintered and took off on its own and that was easily repaired with the fake wood stuff.  In addition to the line block the others were yellow, blue and red.  The final block was for embossing the swan's heads, necks, and wings.  I think it was a successful print, but I, of course, had to run into one pot hole along the road to completion.  I read David Bull's entry on embossing in the Encyclopedia at www.Barenforum.org and he cautioned to dampen the block to keep the paper from slipping.  I guess I overdid the dampen part and the sumi, which had been printed the day before, blurred and ran in places of its own choosing.  Finally, I quit the dampening and had no more problems.  The paper was still damp enough from printing, I guess, that it didn't move.  I confess to cheating - I used the etching press to do the embossing.  It wasn't particularly faster, but it was a lot easier on my elbows, which is what David recommends!  He is just made of sturdier stuff than I am, and besides, he's younger.
Enough good things can't be said regarding Guerra pigment dispersions.  They are just truly fabulously fantastic.  Such nice rich colors and so very little ink used - they are amazing.
The story of Caer and Angus was told on the previous entry, so I won't repeat it here.  Here they are making beautiful music together.  Listen carefully and you may be lulled to sleep for 3 days and nights. (Or maybe just reading this entry will do that.....)